Posts

10 Web-Based Tools for Exploring the Capabilities of OpenAI and Machine Learning

If you're interested in exploring the capabilities of OpenAI and machine learning, there are a variety of web-based tools available that can help you get started. Here are ten of our favorite web tools related to OpenAI: GPT-3 Playground : GPT-3 Playground is a web-based tool that allows users to test and explore the capabilities of OpenAI's GPT-3 language model. Users can input text prompts and see the model's generated responses. OpenAI Codex : OpenAI Codex is a web-based tool that provides access to OpenAI's Codex deep learning system. Codex can be used for a wide range of tasks, such as generating code, completing natural language prompts, and more. DALL-E 2 : DALL-E 2 is an AI model developed by OpenAI that generates images from text descriptions. The web-based tool allows users to input text descriptions and see the model's generated images. Hugging Face : Hugging Face is a web-based platform that provides access to a range of AI models for natural language pr...

Tips and tricks for ChatGPT

Image
 Provide accurate information: If you want ChatGPT to provide more accurate answers, provide it with the most specific and accurate information possible. This will help ChatGPT understand your request better and provide a more accurate answer. Avoid repetitive or unclear language: ChatGPT relies on the data provided to it to provide an answer. If you use repetitive or unclear language, this can make ChatGPT difficult to understand and can lead to providing inaccurate answers. Use natural language: ChatGPT is trained to understand and use natural language. If you use technical jargon or uncommon language, this can make ChatGPT difficult to understand and can lead to providing inaccurate answers. Use specific questions: To ensure that ChatGPT provides an accurate answer to your request, provide specific and clear questions. This will help ChatGPT understand your request better and provide a more accurate answer. Provide relevant information: If you want ChatGPT to provide an accurate...

15 Tips for Effective macOS Operating System Usage

  Use Spotlight for Search: Spotlight is a tool that searches everything on your computer, including files, folders, emails, etc. Optimize Memory: To optimize memory and speed up, use the Memory Management tool in "Utilities". Create Aliases: Create aliases for your favorite files or folders for quicker access. Use Mission Control: Mission Control helps you manage open windows on your screen and switch between Spaces (work environments). Optimize the Dock: Use the Dock to quickly access your favorite apps and optimize it by only displaying necessary apps." Use Time Machine: Time Machine is a built-in backup tool in macOS, allowing you to backup and restore your data easily. Optimize the Screen: Use Spaces to create separate work environments and Exposé to view all open windows on your screen. Use Siri: Siri is the virtual assistant of macOS, helping you perform tasks easily with voice commands. Optimize Downloads: Use the Resume feature to easily resume interrupted downl...

How to fix SVN asks username and password on VSCode start up

- Goto ~/.subversion/auth/svn.simple - Find and delete the config file which contains my svn site. - Add the following to the [auth] section of ~/.subversion/config file: [auth] password-stores= - Then run the following in Terminal in your project's catalog: svn up Now you can restart your VS Code and it should not request for SVN username/password.

How to open the *.war, *.jar files with Midnight Commander (mc)

Image
Open the *.war, *.jar files with Midnight Commander (mc) Description of problem: .war file fails to open in mc with error  Version: mc 4.8.26 Steps to fix this: - Step 1: Open mc, open "Edit extension file" in "Command" menu - Step 2: Then add the following snippet somewhere in the file (add below config under "### Archives ####" section): # jar shell/i/.jar         Open=%cd %p/uzip://         View=%view{ascii} /usr/local/Cellar/midnight-commander/4.8.26/libexec/mc/ext.d/archive.sh view zip # war shell/i/.war      Open=%cd %p/uzip://      View=%view{ascii} /usr/local/Cellar/midnight-commander/4.8.26/libexec/mc/ext.d/archive.sh view zip - Step 3: Open mc and try to open the .war file

macOS 11 Big Sur system requirements

Image
As Apple is rolling out the new major macOS update, Mac owners are getting excited — for a good reason. macOS 11 Big Sur is bringing along major app enhancements and the biggest design change in almost 20 years. You don’t want to miss this. So let’s make sure your Mac complies with all known requirements for Big Sur macOS 11.   Big Sur system requirements: Will your Mac run macOS 11?  The official Big Sur release date hasn’t been announced yet — but it will certainly happen this fall (we have our fingers crossed for September). The developer beta is already there, and the public beta is coming up in July. Whether you’re willing to test the beta or wait for the macOS Big Sur official release, you have to make sure your Mac can take it.  Here’s the list of macOS Big Sur compatible devices:  MacBook (2015 or later) MacBook Air (2013 or later) MacBook Pro (2013 or later) Mac Pro (2013 or later) Mac Mini (2014 or later) iMac (2014 or later) iMac Pro (2017 or later) S...

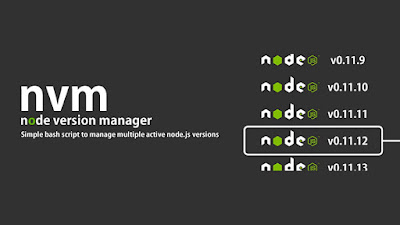
Running Multiple Versions of Node.js with Node Version Manager

Image
If you work on multiple Node.js projects, you’ve probably run into this one time or another. You have the latest and greatest version of Node.js installed, and the project you’re about to work on requires an older version. In those situations, the  Node Version Manager  (nvm) has your back, allowing you to install multiple versions of Node.js and switch between them as you see fit. Getting started To get started, you will need to install the Node Version Manager, or  nvm  on your system. It is included by many package managers, or you can install it manually by running one of the following: # If you have `curl` installed: $ curl -o- https://raw.githubusercontent.com/nvm-sh/nvm/v0.34.0/install.sh | bash # Or if you prefer `wget`: $ wget -qO- https://raw.githubusercontent.com/nvm-sh/nvm/v0.34.0/install.sh | bash Copy Once installed, you will also need to add a couple of lines to your shell’s startup file ( .bashrc ,  .bash_profile ,  .zshrc , et cetera):...