How to free up Hidden Space on MacOs
Large amounts of hidden disk space (when its size hits 100GB and more) or whenever you deleted data but your disk is almost full may also indicate errors in the file system (serious problem with Hidden Space eating up my hard drive)
You can use the DaisyDisk to check. (Download here)
You may need to boot your Mac in Recovery mode and run the Disk Utility to fix that
Step 1: Back up your Mac with Time Machine
When you connect an external drive directly to your Mac, you might be asked if you want to use the drive to back up with Time Machine.Click Use as Backup Disk.
If Time Machine doesn't ask to use your drive, follow these steps to add it manually:
System Preferences > click Time Machine.
Click Select Backup Disk (or Select Disk, or Add or Remove Backup Disk)
Step 2: APFS format and encrypts the volume with Disk Utility
- Reboot the Mac and hold down Command+R to boot into Recovery
- At the MacOs Utilities screen, select “Disk Utility”
If you are running Catalina there will be two volumes probably called Macintosh HD and Macintosh HD-Data
- First Aid Repairs File System Problems (This feature checks the file system for errors and attempts to correct them, all without much intervention from you)
- Delete an APFS volume and Add an APFS Encrypted volume
Note: When you erase a volume, all the data on the volume is permanently erased, and the empty volume remains in the container.
Remember this is going to delete all your data so make sure you have your data backed up
Step 3: Reinstall MacOs
After clicking Reinstall macOS, click on Continue.
Step 4: Restore from a Time Machine backup
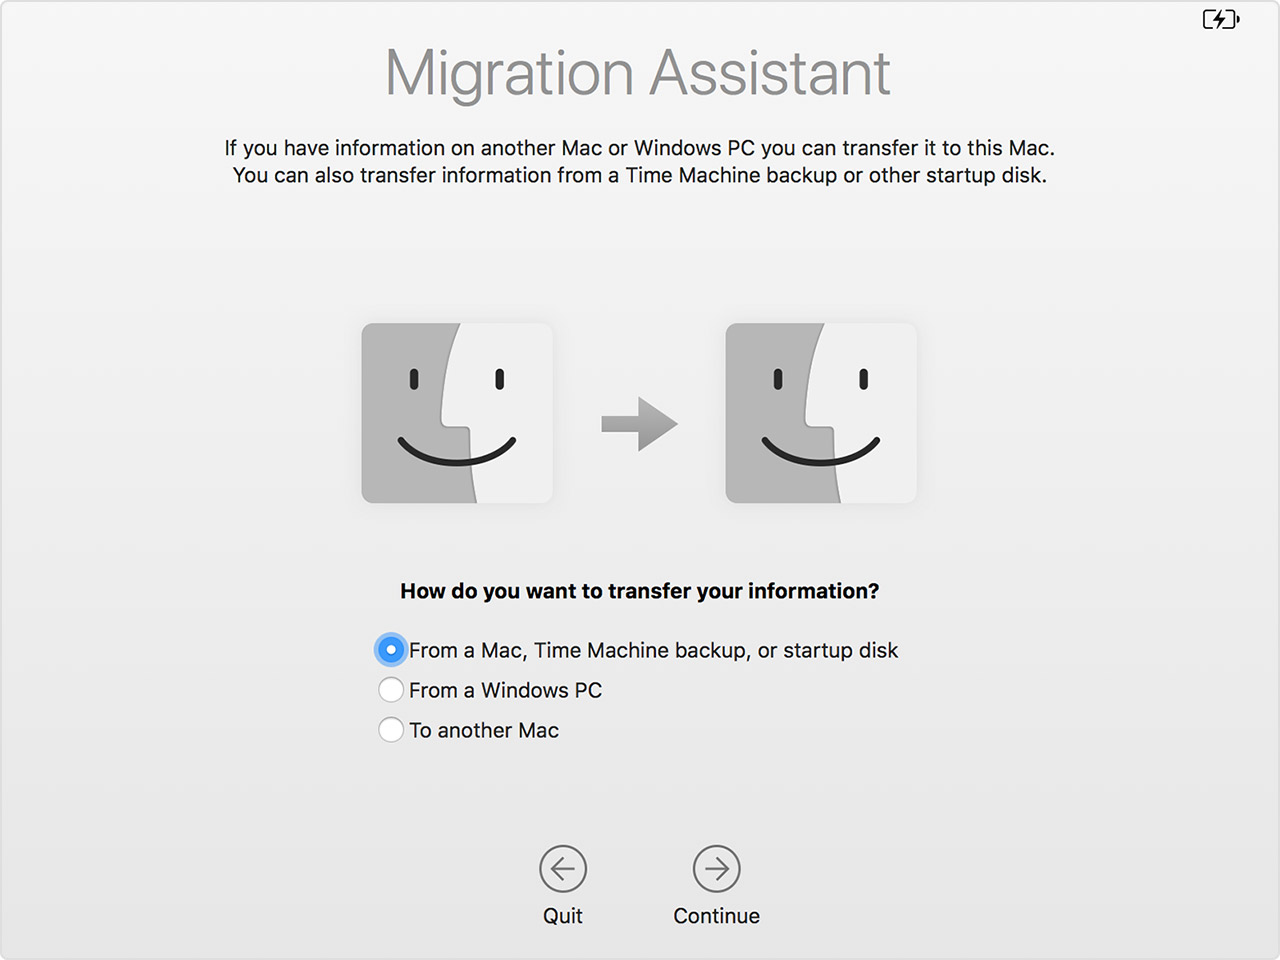
When you're asked how you want to transfer your information, select the option to transfer from a Mac, Time Machine backup, or startup disk. Then click Continue.
If you have a lot of content, the transfer might take several hours to finish. When the transfer is complete, restart your Mac and log in to the migrated account to see its files.
The operating system will free the space :)
Hopefully this helps other people who encounter this problem!
You can use the DaisyDisk to check. (Download here)
You may need to boot your Mac in Recovery mode and run the Disk Utility to fix that
Step 1: Back up your Mac with Time Machine
When you connect an external drive directly to your Mac, you might be asked if you want to use the drive to back up with Time Machine.Click Use as Backup Disk.
If Time Machine doesn't ask to use your drive, follow these steps to add it manually:
System Preferences > click Time Machine.
Click Select Backup Disk (or Select Disk, or Add or Remove Backup Disk)
Step 2: APFS format and encrypts the volume with Disk Utility
- Reboot the Mac and hold down Command+R to boot into Recovery
- At the MacOs Utilities screen, select “Disk Utility”
If you are running Catalina there will be two volumes probably called Macintosh HD and Macintosh HD-Data
- First Aid Repairs File System Problems (This feature checks the file system for errors and attempts to correct them, all without much intervention from you)
- Delete an APFS volume and Add an APFS Encrypted volume
Note: When you erase a volume, all the data on the volume is permanently erased, and the empty volume remains in the container.
Remember this is going to delete all your data so make sure you have your data backed up
Step 3: Reinstall MacOs
After clicking Reinstall macOS, click on Continue.
Step 4: Restore from a Time Machine backup
When you're asked how you want to transfer your information, select the option to transfer from a Mac, Time Machine backup, or startup disk. Then click Continue.
Make sure that your Time Machine backup disk is connected to your Mac and turned on
Select your Time Machine backup, then click Continue
If you have a lot of content, the transfer might take several hours to finish. When the transfer is complete, restart your Mac and log in to the migrated account to see its files.
The operating system will free the space :)
 |
| Hidden space |
Hopefully this helps other people who encounter this problem!


Comments
Post a Comment